Let’s say we want to learn a VMware vSphere products, such as ESXi server, vCenter server, HA, vMotion, FT, … We could do that with two physical servers on which we would install ESXi hypervisor, but we don’t have servers to spare, we don’t want extra heat generated and electricity consumed in our datacenter. Perhaps we want our test environment to travel with us. We can do this on our laptops! For labing something out before production, for preparing an exam, …
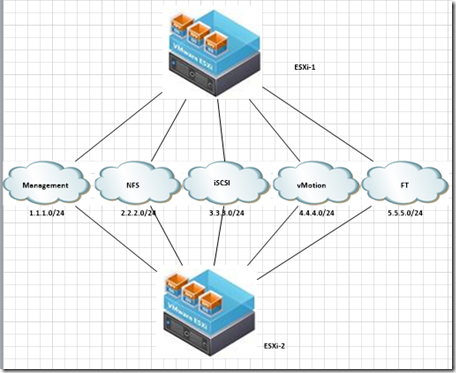
So, we will create the lab that is depicted in the following diagram:
We have two ESXi hosts that are connected to varies networks for varies purposes: management, NFS, iSCSI, vMotion and FT. Although some of these features (perhaps all?) could use single adapter, this is not considered a best practice.
The only physical thing in this lab is my laptop. Everything else is virtual! I’m running this lab on Windows8 and VMware workstation 9.
To create this lab, we will go through these steps:
- Installing and setting up VMware Workstation
- Installing the ESXi host as a virtual machine
- Installing a vSphere Client
- Installing a vCenter Server
- Configuring networking for NFS and vMotion
- Try this all out
- Installing and setting up VMware Workstation
After downloading this product from VMware’s site, we start the installation. This is an easy, several steps process. Let’s begin …
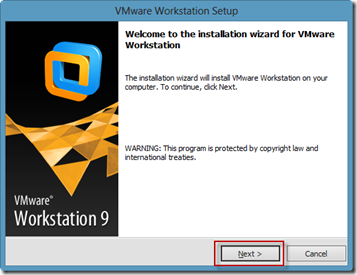
After starting the installer we click “Next”.
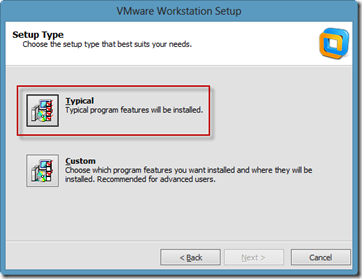
We will be OK with the “Typical” installation.
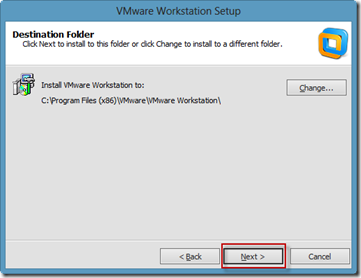
Let’s leave a default installation location and click “Next”.
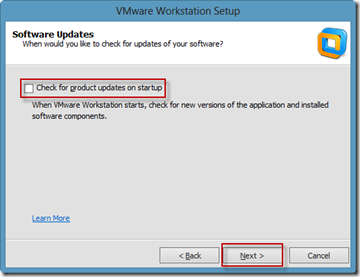
We deselect “Check for product updates on startup”.
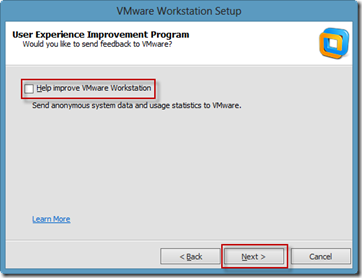
Right now we don’t want to participate in VMware’s improvement program. So we deselect “Help improve VMware Workstation” and click “Next”.
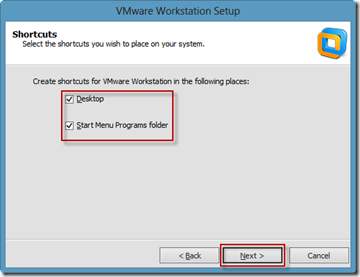
We want to create shortcuts.
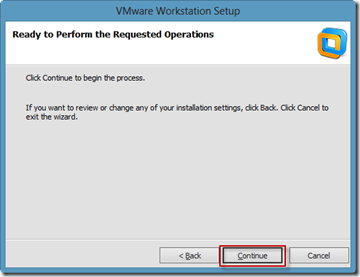
We click “Continue”.
And the process is done.
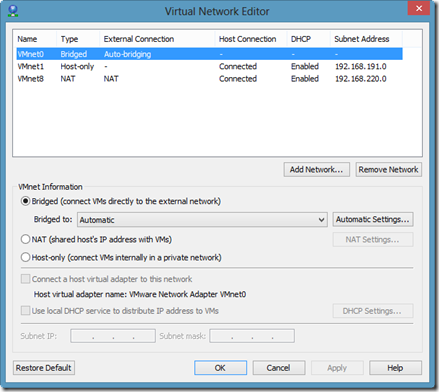
Now it’s time to start the Workstation and go to the “Virtual Network Editor”. We select “Edit->Virtual Network Editor”. The defaults should look like this:
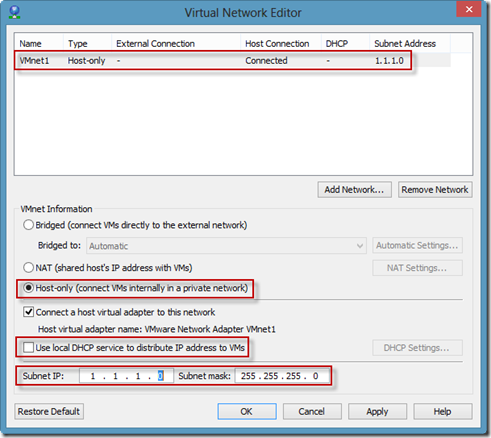
This is not what we want, so we will first delete all networks by selecting each of them and clicking “Remove Network”. Then we will add our networks to match our diagram. We click “Add Network”, then select VMnet1 for our management network and click “OK”. Then we make sure that the “Host-only (connect VMs internally in a private network)” option is selected, the “Use local DHCP service to distribute IP address to VMs” deselected, the “Subnet IP” is 1.1.1.0 and the “Subnet mask” is 255.255.255.0. When we click “Apply” our settings should look like this:
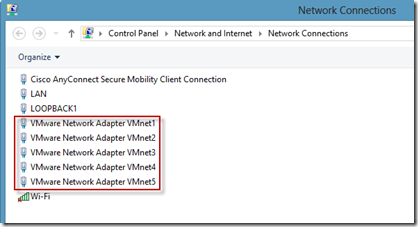
We repeat the process for all other networks. When we are done, within a network connections we should see all our networks:
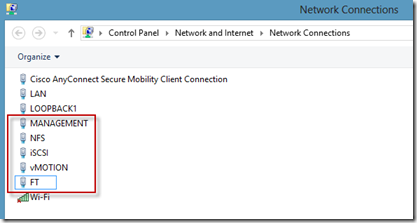
We will rename all connections, so it is clearer to us which network is for which purpose. Right click a network, selecting “Rename”, repeated for each connection will eventually yield to this situation:
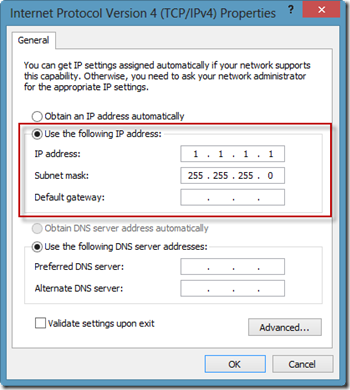
Now we make sure that each connection has proper IP settings. For example the Management network:
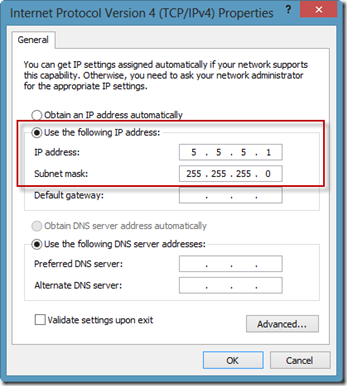
And the FT network:
We should have in mind that these settings will break communications to real IP addresses used here. For example we won’t be able to reach anything that belong to the 1.1.1.0/24 segment from our laptop. Perhaps we should use 192.168.0.0/24 or similar networks, but this will do for the lab.
- Installing the ESXi host as a virtual machine
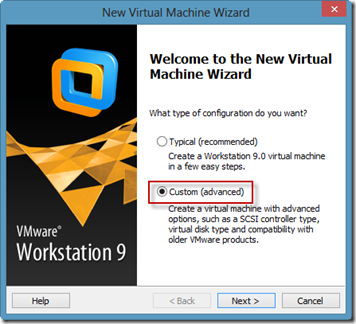
From the Workstation we select “File->New Virtual Machine” and start the wizard. We select “Custom (advanced)”:
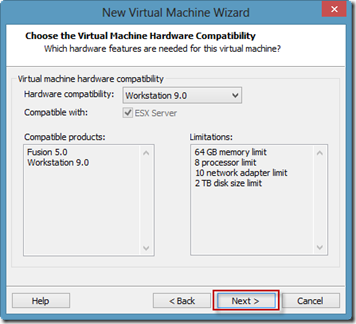
On the “Choose the Virtual Machine Hardware Compatibility” screen we click “Next”:
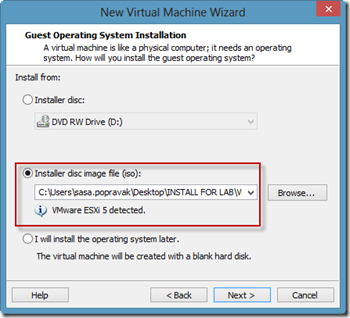
Now we browse for an ESXi 5.1 ISO image and Workstation will detect what OS is in the ISO:
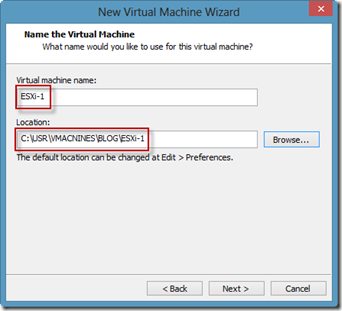
Next we give a name and specify location for the VM:
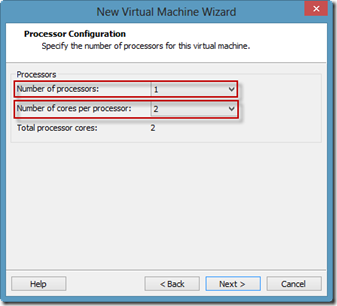
On the “Processor Configuration” screen, we select one for “Number of processors” and two for “Number of cores per processor”. These are minimums for ESXi 5.1. We could go higher here, depending on our laptop’s hardware:
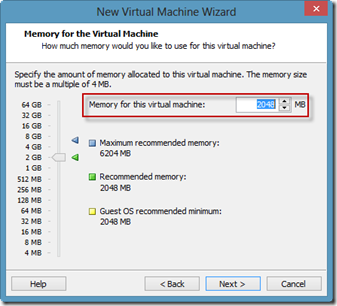
For memory size, again the minimum is 2GB, but we could go above:
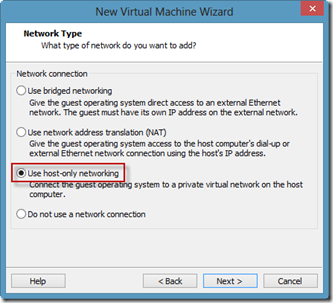
On the “Network Type” we can select any option, because we will have to change it later, no matter what we select now:
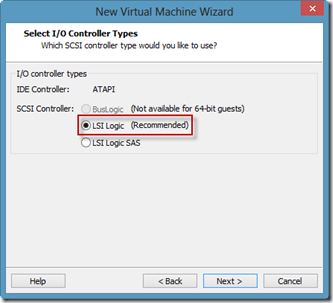
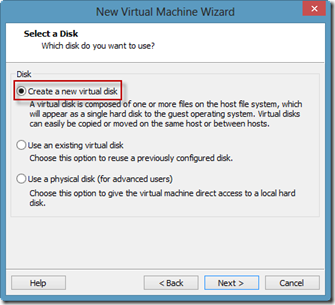
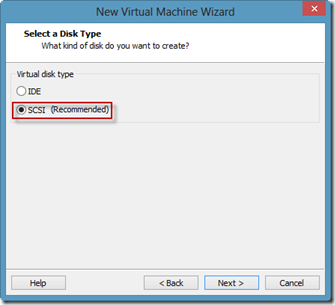
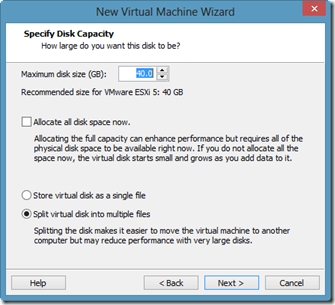
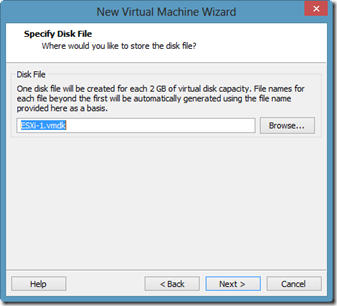
On the following several screens, we just accept defaults:
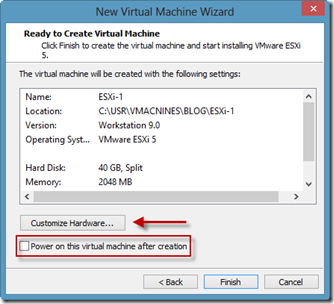
Finally, on the “Ready to Create Virtual Machine” we deselect “Power on this machine after creation” and click “Customize Hardware”:
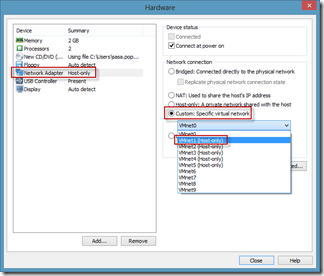
In the “Hardware” dialog, we only need to change the network adapter to match our requirements. For the management network we will select “VMnet1”, for FT network “VMnet5” and so on:
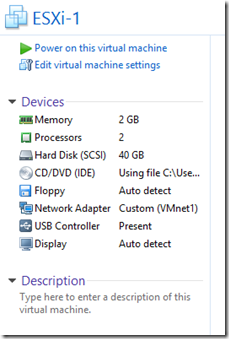
Our summary portion of the Workstation windows should now look like this:
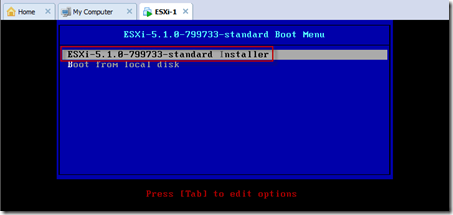
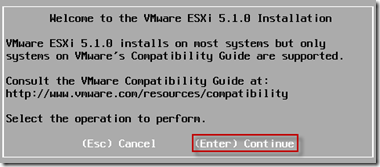
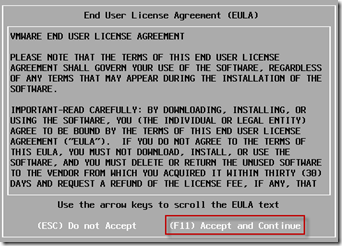
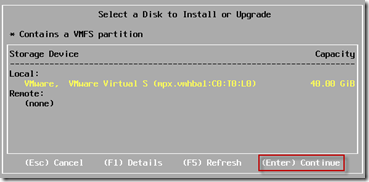
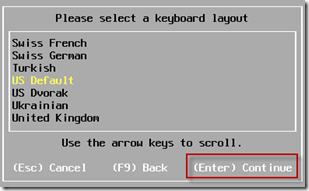
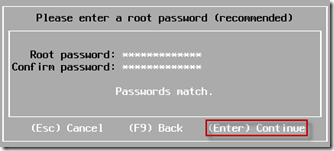
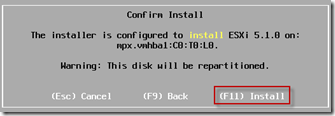
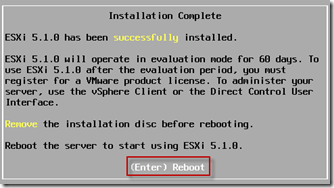
Now we are ready to power the machine on, and begin installation of the ESXi. This is illustrated in the following pictures:
Now we must specify and verify the root password and carry on:
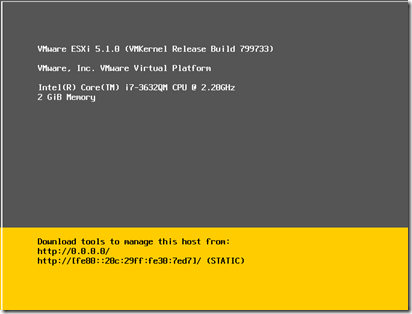
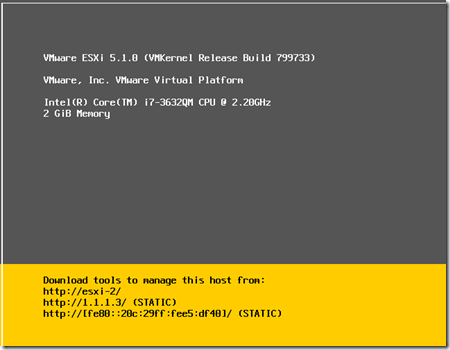
After the VM is rebooted, we are presented with the ESXi console screen:
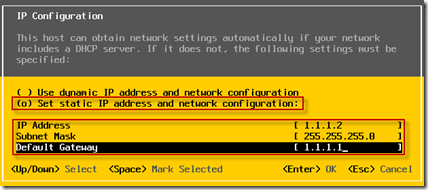
There are several more steps that need to be completed. We start completing them by pressing the F2 key. From the menu presented to us, we go under “Configure Management Network”. Under the “IP Configuration” we specify the IP address of 1.1.1.2 and subnet mask of 255.255.255.0. Remember, this has to be in the same segment as the IP address we specified under the “VMnet1” adapter’s configuration. The default gateway has no meaning to us in our lab, but we must specify something, so we pick 1.1.1.1:
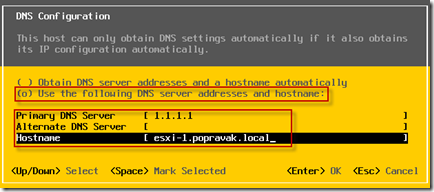
Under the “DNS Configuration” we need to specify a primary DNS server and a hostname. Here we can make choices. If our laptop is running Windows7/8, we would need another VM inside Workstation to act as a DNS server, or we could install a VM inside the ESXi host that we installed inside the Workstation. Funny, isn’t it 🙂 If our laptop is running Windows server OS or Linux, we could install a DNS directly in the OS that laptop is running. I’m running Windows8, so for now I will choose 1.1.1.1 for DNS server and change it later when we install a DNS server as one of available options:
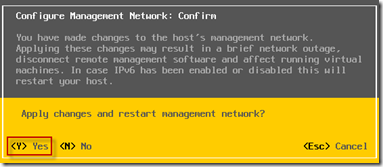
Finally, we press “Escape” and confirm our changes with “Yes”:
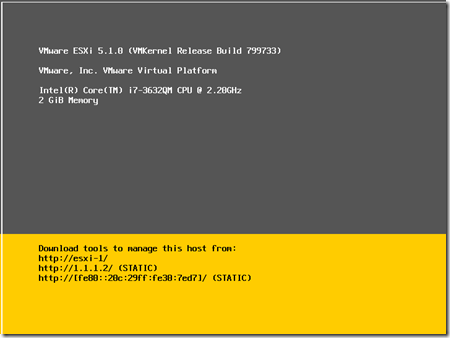
Now we have our first ESXi host installed and set up:
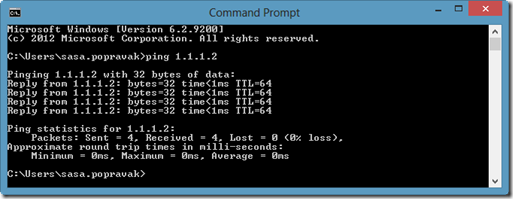
We can now ping the 1.1.1.2 from our laptop:
Installing a second ESXi host is almost identical. After we are done we have this screen:
- Installing a vSphere Client
Now when we have two virtual ESXi hosts, we need a tool to manage them. This tools is called vSphere Client. We can download this tool from VMware site. We have several choices here about where we would install this client. Similar to a DNS server installation. We could run it from a host OS, which is Windows8 in our case, we can run it from a VM inside the VMware workstation, or we could run it from a VM installed within a ESXi host that is running as a VM inside the Workstation. Fun stuff again 🙂
Let’s run it from a Windows8 host OS…
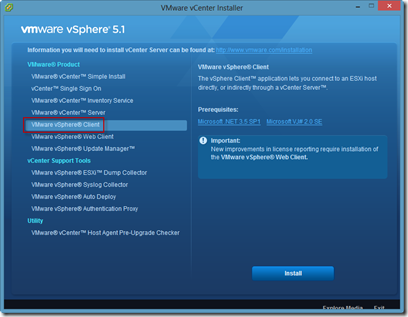
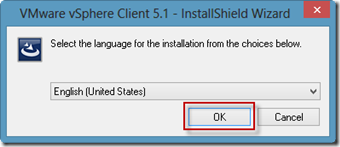
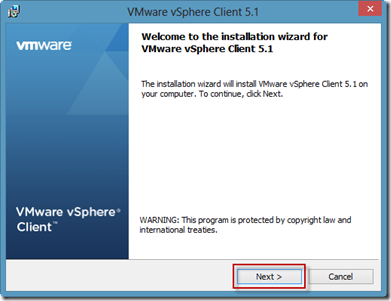
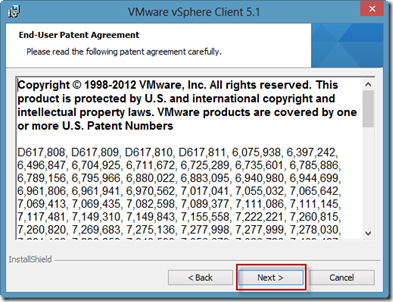
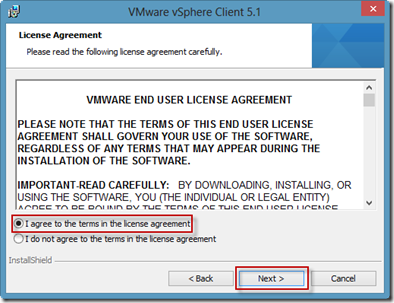
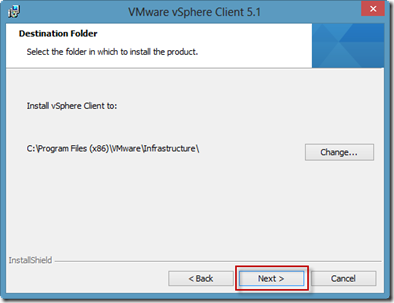
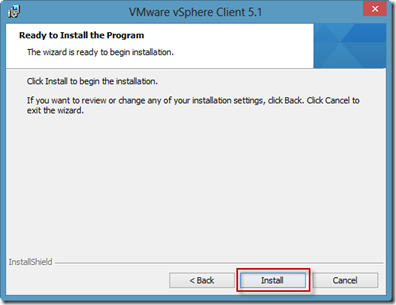
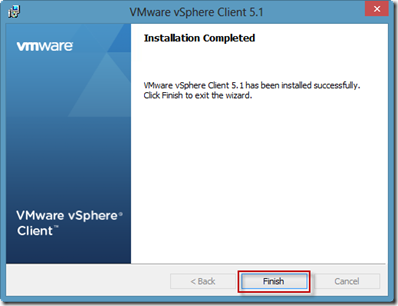
We have a VMware vSphere ISO image downloaded and unpacked. Then we start the installation:
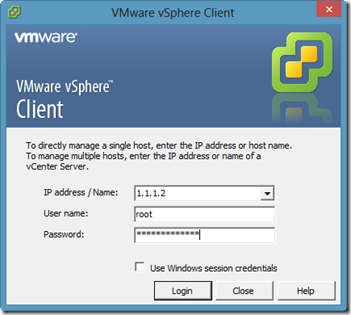
Now we start vSphere client, and connect to one of our ESXi hosts:
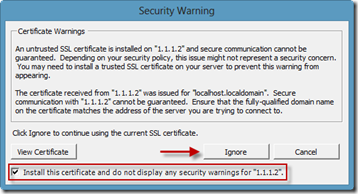
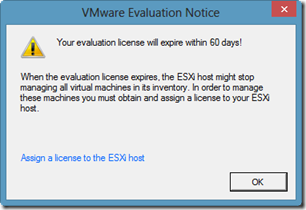
First time we will be presented with this certificate warning, which we will acknowledge. We will also acknowledge the evaluation dialog box warning:
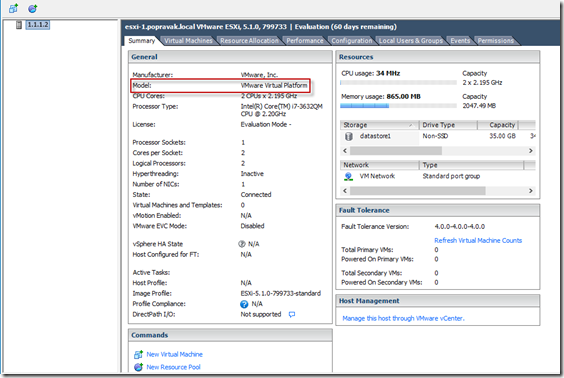
And now we have our ESXi hosts managed with vSphere client, and we are ready to install our first virtual machine, which will be a vCenter Server.
- Installing a vCenter Server
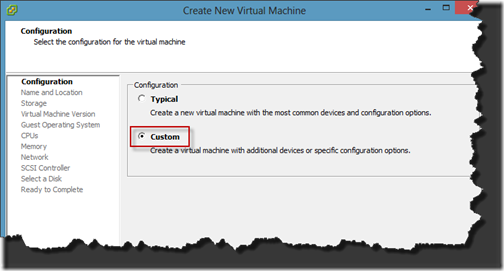
From vSphere client, we select “File->New->Virtual Machine”, and complete a wizard. First we select “Custom” for virtual machine creation type:
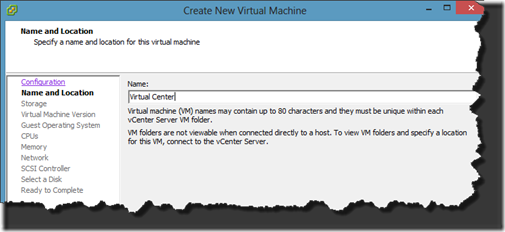
We give it a name:
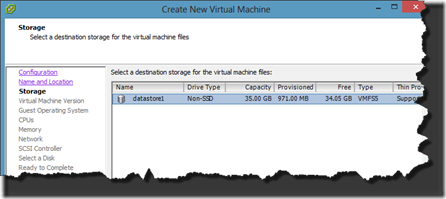
For now, we only have a local datastore. So we will create this VM on that store, and later we will migrate it on the shared datastore:
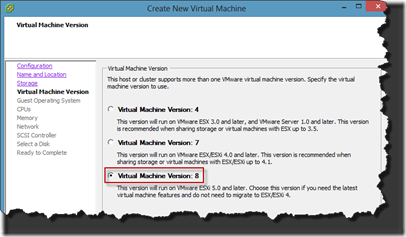
The hardware version should always be as higher as possible:
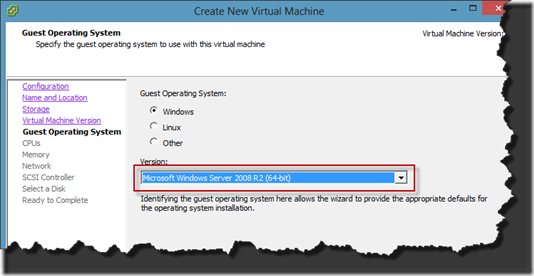
For guest OS version we select “Microsoft Windows Server 2008 R2 (64-bit)”. We could say here “Microsoft Windows 2003 (64-bit)” as well, but we have to have in mind that vSenter 5.1 can only be installed on 64-bit version of Windows:
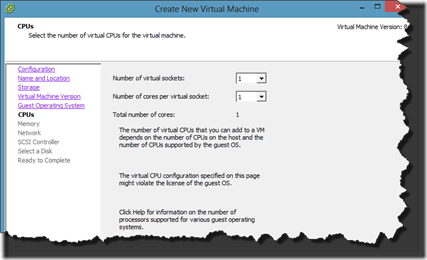
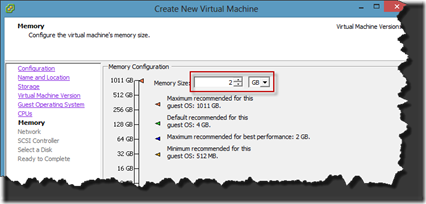
Depending on several choices, the amount of RAM required can vary. For lab environment I would suggest at least 2GB. More is better, but we are limited by the max amount of physical RAM on our laptop. For CPU, we can go with the defaults in our environment:
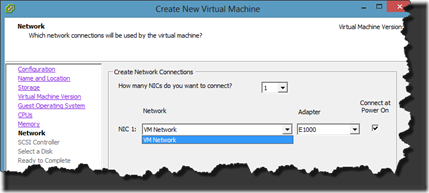
Although we created several networks, only one, VMnet1 or Management network is available to us at this moment. This is OK for now:
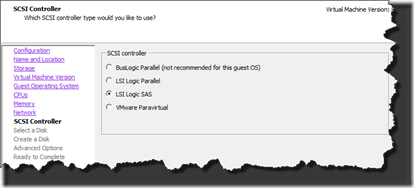
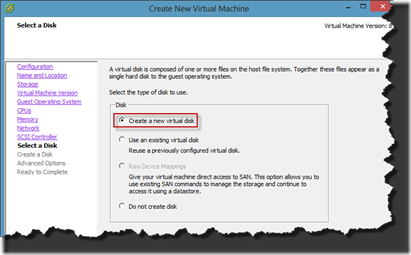
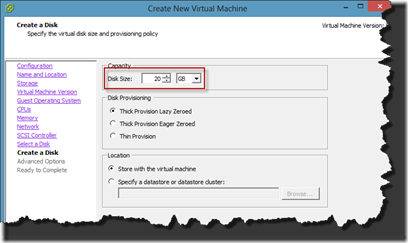
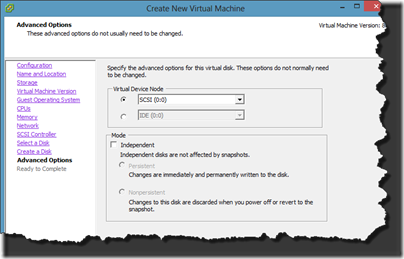
Next several steps, we will go with the defaults, except for disk size. We cannot accept default of 40GB, because we created our ESXi host with 40GB, but ESXi itself took some space:
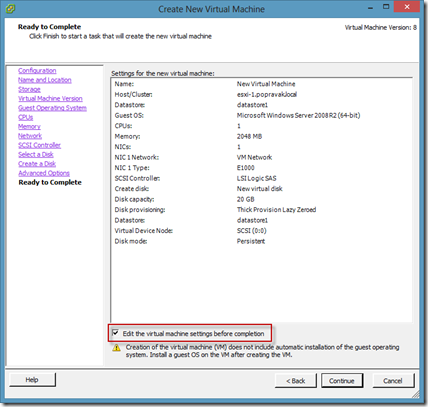
After reviewing our settings, we need to mount an ISO image containing the installation of “Microsoft Windows Server 2008 R2 (64-bit)”:
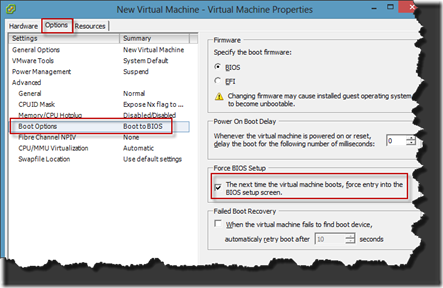
Before we power on the VM, we should edit settings, go under “Options”, “Boot Options”, and we select “Force BIOS Setup”. This is to ensure that when we power on the VM for the first time, it will go in the BIOS, so we can say that we want it to boot fro CD/DVD drive:
Now we power on the VM and install Windows server. I guess we all know how to do that, so I will not show these steps.
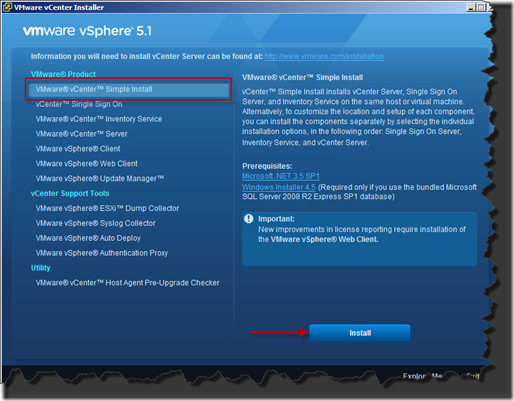
Ok, that went very well 😉 Now from within the VM we mount an ISO image that contains a vSphere Server installation files, and run the setup. Previously, we used the same installer to install the client and now we will use it to install the server. So we select “VMware vCenter Simple Install”. We could install all of components separately, such as database, “Single Sign On” and so on, but for the sake of simplicity, we will use the option of simple install. This option will install all needed components for us: the database, “Single Sign On”, “Inventory Service” and “vSphere Server” itself.
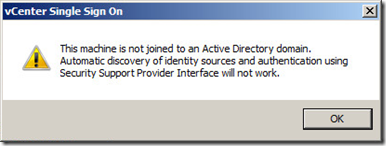
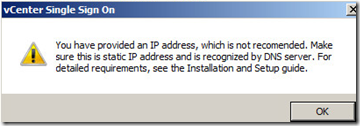
After clicking “Install”, a simple wizard is run. First, the SSO install will begin. We can safely disregard this warning:
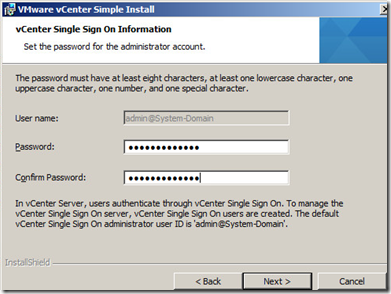
After several “nexts”, we need to provide the administrator’s password for the SSO service. Any other service that needs to connect to SSO service will need this password:
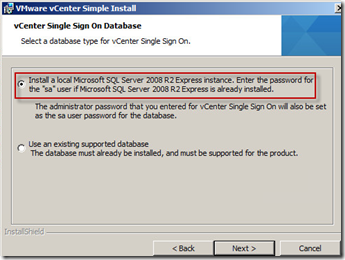
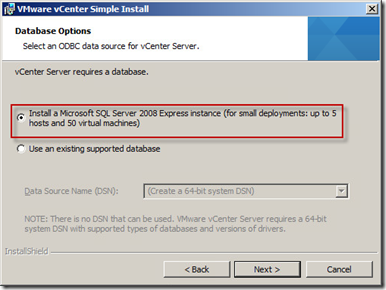
For the database, we will use the defaults, because this is a lab installation:
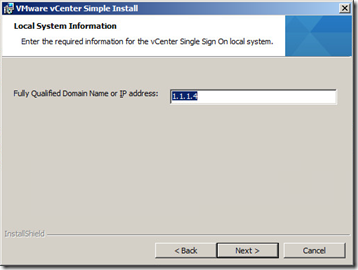
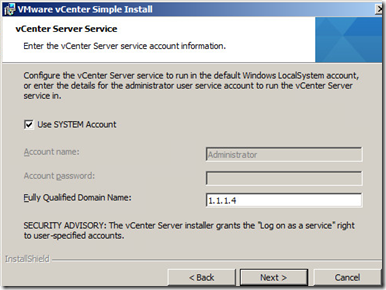
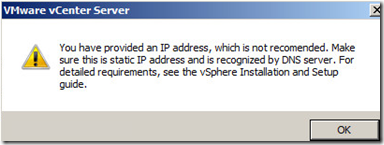
Next, we can use the IP address or FQDN. It is recommended to use FQDNs, but we so far don’t have a DNS and the IP address will do for the lab:
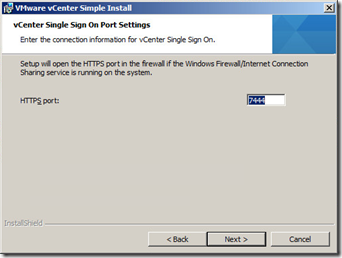
We could change the port number, but for most installation, the default will do:
Now we wait for the SSO installation to complete. Time for coffee…
After the SSO and its database is installed, the wizard will install the database for the vCenter server:
Same warning for IP/FQDN choice:
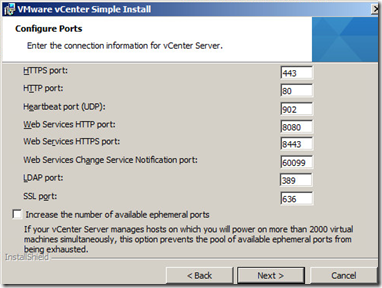
It’s best to leave ports to defaults. Because we have small numbers of VMs, we don’t need additional random ports:
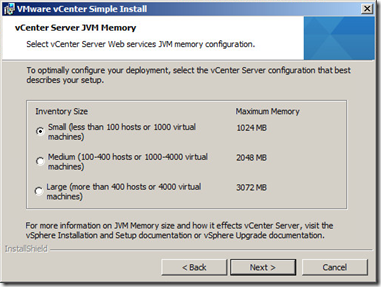
Then again, the defaults:
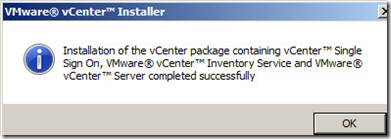
After another coffee, the vCenter database is installed, as well as the “Inventory Service” and the vCenter itself. This is what we want to see:
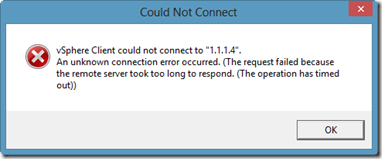
Before we connect to vCenter server, one thing we should keep in mind: in the lab like this, starting of vCenter server can take some time. So we need to be patient and wait for a services to start:
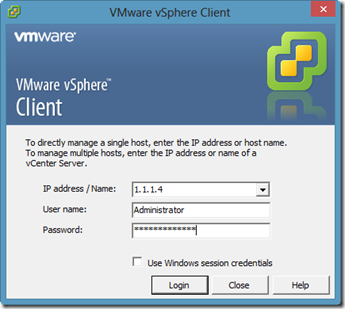
We connect to vCenter server using the same interface as before, but now we use the IP address of Windows server and credentials of local administrator:
Because now we don’t talk to the ESXi server, but to the vCenter server, we again have the certificate warning. We can safely ignore it.
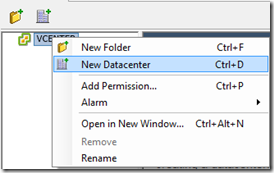
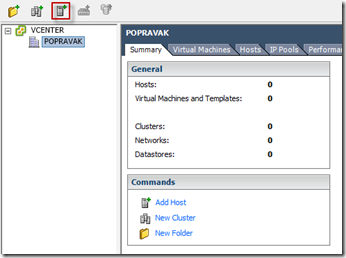
Now we create a virtual datacenter:
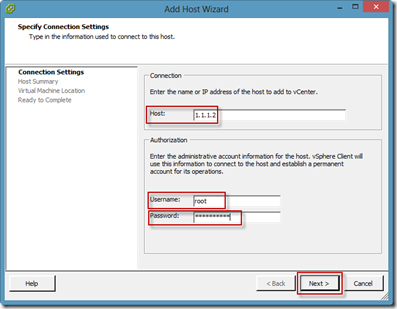
And we add first ESXi host:
The wizard is fairly simple:
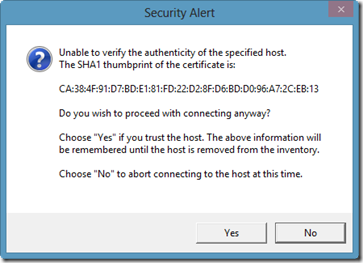
We accept the certificate:
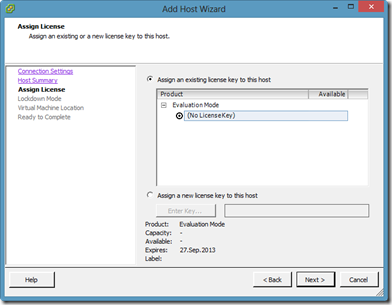
And use the evaluation license:
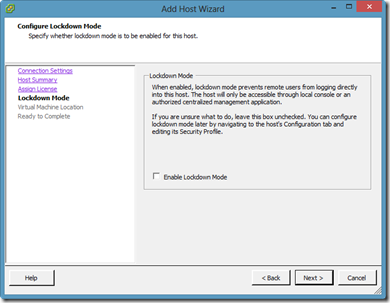
For now, we will not engage the “Lockdown Mode”:
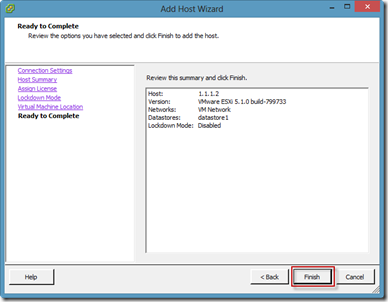
Now we select the datacenter. We only have one. Finally, we review the summary and click “Finish”. The agent will be installed on ESXi host that will be used by the vCenter server to centrally manage this host:
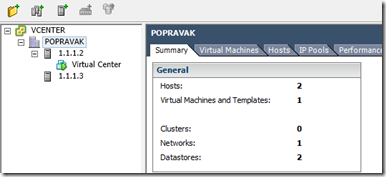
This process of adding the ESXi host should be repeated for the another ESXi host. Then we will have this situation:
We have now two ESXi hosts managed by a single virtual vCenter server running on one of ESXi hosts. Next thing is creating a shared storage and try one of advanced features, such as vMotion.
- Configuring networking for NFS and vMotion
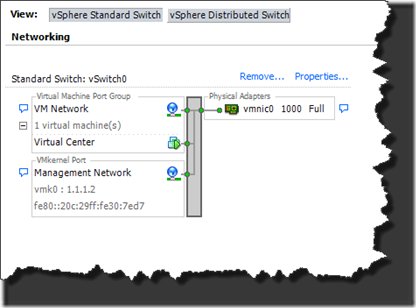
Remember our diagram and network settings in host OS? At this time we only have our management network set up:
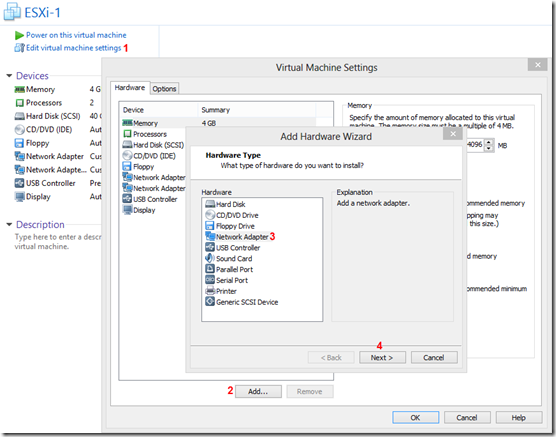
Now we should add two additional network adapters to our ESXi hosts. One will be VMnet2 and will be used for the NFS and one will be VMnet4 for VMotion. First we power off ESXi hosts and add two adapters in each hosts. Within the Workstation, we select “Edit virtual machine settings”, then click “Add”, select “Network Adapter” and click “Next”:
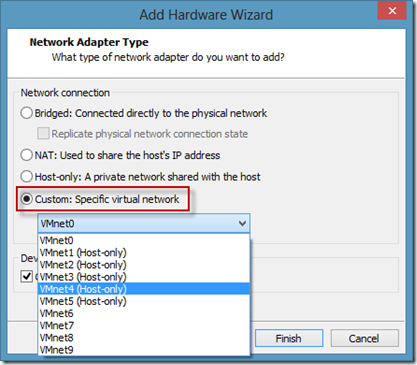
For the “Network Adapter Type” we select “Custom” and then VMnet2 for NFS and VMnet4 for vMotion:
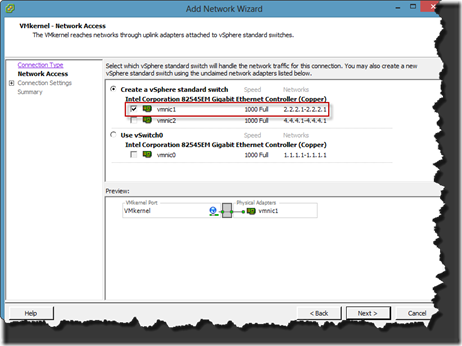
Now we power ESXi hosts back on and go under the network configuration. We should setup our newly added network adapters. First we add a NFS adapter. We click “Add Networking”, select “VMkernel” type and click “Next”. We can see our two adapters with proper network addresses listed along each adapter:
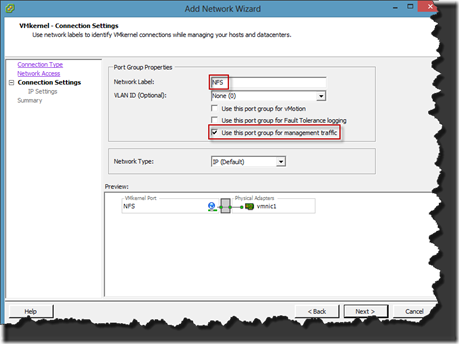
We select “vmnic1” and click “Next”. We give this network a name, check “Use this port group for management traffic” and click “Next”. The NFS communication is handled through the management enabled interface, and hence this option:
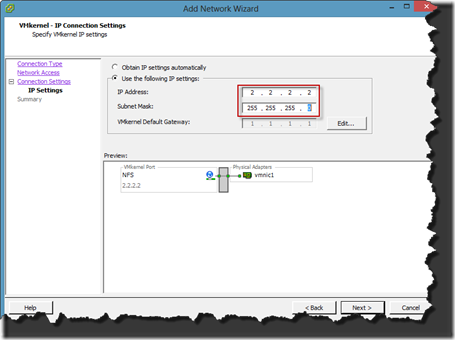
Next we specify the IP address settings:
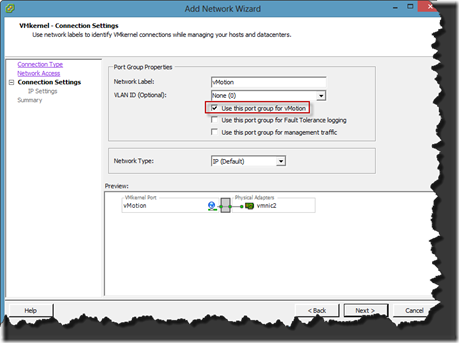
Then we repeat these steps for vMotion network. The differences are in IP settings and the option “Use this port group for vMotion”:
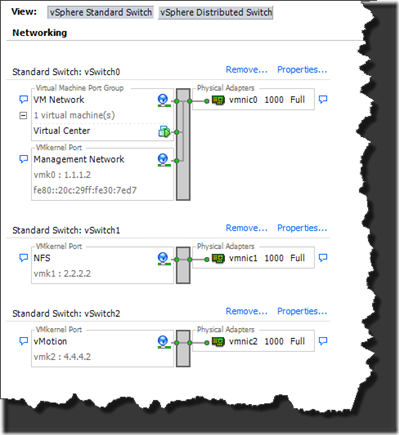
Now our network settings look like this:
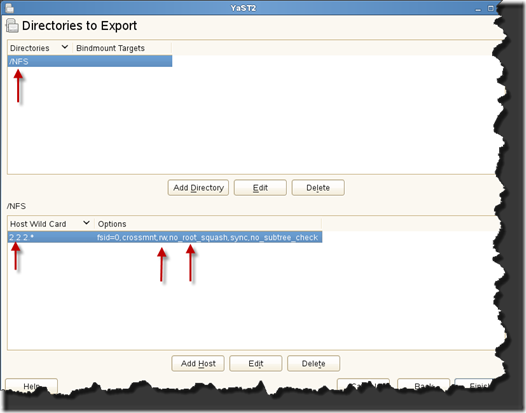
Behind the scenes I have installed another VM, a SLES Linux which will be used as a NFS shared storage. I won’t be showing here how to install this Linux and set up a NFS share, but I will show how the NFS setup screen should look like:
Here we can see that we publish the “/NFS” folder, which must be created on the file system. Also we can see that the wildcard list is “2.2.2.*”, which means that only hosts form only NFS network can actually access the NFS store. Finally, we set up “rw” and “no_root_squash” options.
To use this NFS storage, under “Configuration->Storage” we click “Add Storage”. Then we select “Network File System” as a storage type and click “Next”:
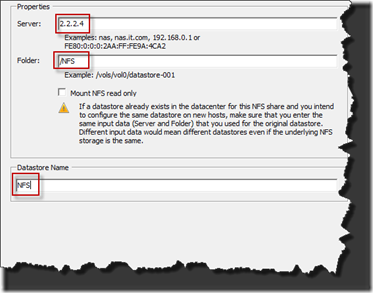
Now we give the IP address of our Linux NFS VM, folder that we share from that server and a datastore name:
Please note that the NFS share should have these options enabled: rw, no_root_squash and appropriate host access wildcard (in our case 2.2.2.*). If everything goes well, we should see our shared storage:
- Try this all out
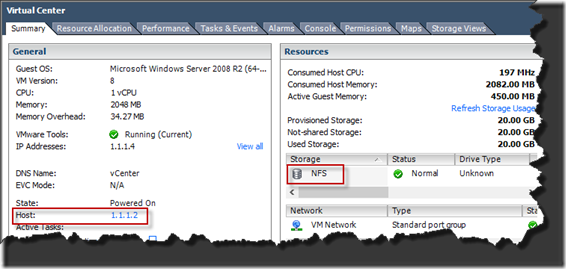
After we set up the other ESXi host the same way, we can first migrate our vCenter Server to the shared storage and vMotion it from one host to another. First, let’s move vCenter Server from ESXi-1 to ESXi-2. We select “Virtual Center” VM, right click and click “Migrate”. Then we select “Change datastore” and select NFS datastore. This could take a while, so it’s time for coffee.
Ok, finally! Now we have our vCenter Server on the shared storage and is powered on on the host “1.1.1.2”:
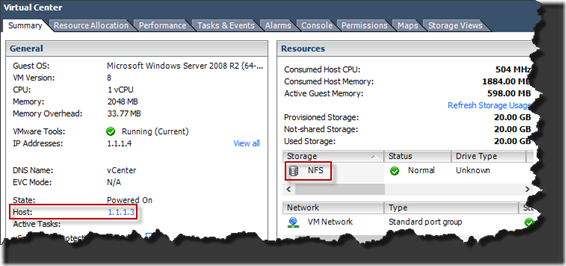
Let’s now vMotion this VM to another host, without interrupting the service. Right click the VM, select “Migrate”, select “Change host”, select the 1.1.1.3 and complete the wizard. After a while we can see that the VM is now running on another host and no service was interrupted:
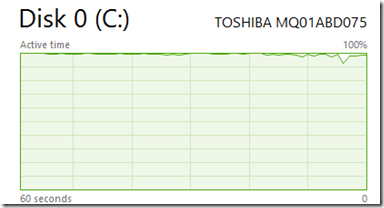
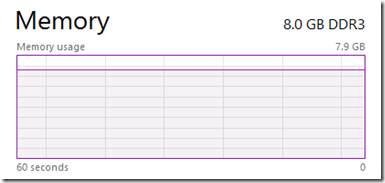
In a similar fashion we can play with a cluster and other features. One final thing I would like to pint out. I created this lab on a “HP ProBook 4740s” with 8GB of RAM and here is its health with only one VM powered on:
Of course, powering a few more VMs won’t affect the memory usage, because they will use the memory already consumed by ESXi hosts, but disk here is a big issue. So I would recommend a 16GB of RAM and SSD disk. This way we could try many vSphere 5.1 features.
Thanks for reading!



Hi thanks for this nice information,
I did the same thing but I used vCenter Server apliance and Openfiler, I reserved 6 GB for one host which I installed the appliance, but it was sooooooo slow to start the server, I coudlnt do at least login with vClient, why is that? I also have 8 GB RAM, core i3 lap top
Also I have questions, why u are saying go for SSD, if I have a herddisk with 6Gbps, will it necessary to go for SSD ?
Well, the SSD disks are (typically) faster. If you have faster disk, then forget about SSD.
I have tried myself vCenter Server Appliance and never made it, so I went for the Windows version. Even on Windows it took some time for vCenter Server services to start, so perhaps you should wait a while with the appliance.
Pingback: 70-640 home virtual Lab creation - Page 2
Would you mind telling me what laptop brand you bought and the specs so i can get an idea? thanks.
I’m using HP ProBook 4740s and DeLL Inspiron n5110 both with 8GB RAM and Core-i7 CPU. It is enough for testing most of features, but I would still recommend a 16GB of RAM with the same or better CPU.
My laptop is HP Envydv7 with i7 processor, 16GB RAM and a 1TB SATA HDD.
Let me know if you require additional information because I want to start making use of this lab as soon as possible.
Best regards,
Best regards, Kunle Ajayi.
Hello Sasa,
Thanks for this great piece, it was quite informative and practical enough until I got to the point of adding my 2nd Host (ESXi_1) to the datastore which is point I got stucked. My Windows vCenter VM was created inside ESXi_2 but it was amazing that I cannot ping (communicate) with the ESXi_1. Please is there a way I can make my vCenter to be able to communicate with the second host. I will appreciate if you can send me your e-mail address so that i can be able to send you screenshots of the error.
Looking forward to your prompt response to be able to forge ahead on this lab setup.
Many thanks.
Kunle Ajayi (Nigeria)
I have sent you a private e-mail to further discuss this.
You said you can communicate with one but not the other ESXi host. Can you attach screenshots of network settings from both to be compared?
Also please attach screenshots of network settings of vCenter Server.
Thanks.
But please how can i attached the screenshots here?
Thanks Sasa for the post, great stuff. Can you point me in the right direction on how to get internet access to the nested vm lab?
Well, that should be easy 🙂
Just add/configure another VMnet inside the Workstation and make it of type “bridged”. Choose automatic bridging or manually bridge to either wired or wireless connection on your laptop.
Then assign this VMnet to your ESXi host and boot the ESXi. Create a virtual switch and assign newly added VMnet/vmnic. You should set up your ESXi’s default gateway to something reachable via this vmnic, either a router or a wireless AP. This is the default gateway your laptop is using to go out. Of course, you should use static routing for your VMware networks, because you just changed the default gateway. When you create your VMs, just assign them to this virtual switch and configure the IP settings to match the settings of the physiacal adapter you are bridging to.
That should do it 🙂
Sasa,
I was able to make the new VMnet inside Workstation and it was made at “bridged” i did assign this to the ESXi box and created the virtual switch for it in turn Can you show by example (screenshots please 😉 ) ? Im stuck at the point of changing the default gateway and adding the new vmnic. Also what would the static route look like on the ESXi server if the default gateway for the router is 192.168.1.1. If you need to talk to me through email, feel free. =)
thanks,
Matt
Well, I cannot put any screenshots right now, because i just “upgraded” my W8 to Ubuntu and I have problems with networking witnin Workstation in Ubuntu 😦
However, if your default gateway for laptop is 192.168.1.1, it should be default gateway for ESXi hosts and VMs. In my lab, there is no need for static toutes, because ESXi hosts are in the same segment as storage devices (iSCSI, NFS) but if they were not you should log in to your ESXi hosts (first enable SSH, because it is disabled by default) and, depending on version, you type:
esxcli network ip route ipv4 add –gateway 10.1.65.100 –network 192.168.168.0/24
or
esxcfg-route -a 192.168.169.0/24 10.1.64.100
Now you can list your routes with:
esxcli network ip route ipv4 list
or
esxcfg-route -n
Please remember that these routes are NOT permanent and are lost after reboot, so you should change the “/etc/rc.local” file accordingly. Something like a “-p” switch in Windows.
I hope this helpes for now.
Sasa,
Thank you so much. Strange thing is, I gave the VM the nic that is the bridged vmnic, without changing the esxi gateway. I changed the IP of the vm to match the internal network that would get me outside and it worked fine. Im using workstation 10 and im assuming it does the routing behind the scenes? Once again thank you so much for your help and I’ll stay in touch.
Matt
hi Sasa,
Thanks for the article. I have a similar on my desktop pc. I want to configure different vlans for my vms and keep virtaul esx on trunk port and vms on access port.
Can you please on how to go about it
You could try adding a network module NM-16ESW to a GNS3 router. Then you could try connecting ESXi hosts through this module. I didn’t try it, so it’s just an idea to work on.
Good luck 🙂
Hello SASA! Great articles
I have an existing VMware 5.5 lab setup in VMware 9 Workstation. I run into a problem when I go to Create a Standard Switch with a Virtual Machine Port Group. I go to ADD HOST NETWORKING, SELECT VIRTUAL MACHINE PORT GRUOP FOR A STANDARD SWITCH and click Next, select New Standard Switch, click Next, click + Icon under Assigned Adapters and receive a prompt “NO PHYSICAL ADAPTERS AVAILABLE” I only see VMNIC0. How do fool VMware into thinking I have two NIC when I only have one physical NIC on my LAPTOP.
Thank you for taking the time to assist.
STUDENT
Power down your ESXi server. Then from the Workstation, select the ESXi server and click “Edit Virtual Machine Settings”. Click “Add” and select “Network Adapter”. Chose the network adapter type. Most probably you will use “Custom: specific virtual network” that you created with the “Virtual Network Editor”. Click “Finish”, then “Save” and power on the ESXi host. Then you will have additional adapter (vmnic1) that you can assign to what ever your needs are. You can, of course, add more than one adapter.
Hope this helpes.
Thank you again for taking the time to answer my question. Your suggestion fixed my problem.
Student
Hi Sasa,
This article is really helpful. I am learning VMware. About the NFS Shared storage you informed that “Behind the scenes I have installed another VM, a SLES Linux which will be used as a NFS shared storage. I won’t be showing here how to install this Linux and set up a NFS share,” Did you install this on any of the two hosts? Also may I get the steps on how to install this vm(with SLES Linux)and set up a NFS share with screen shots? I have a i3 processor with 6GB Ram will that be sufficient to create a lab with features you showed in this article.
Thanks,
Learner.
You could install the NFS server as a VM inside one of two hosts, but installing it as a separate virtual machine makes more sense. You have a feeling that you have real external storage :))
I believe you could run this lab on your PC. At least ESXi 5.1. Not sure for ESXi 5.5, because it wants twice as much RAM as 5.1.
I will do my best to describe how to make this NFS server.
Thank You Sasa, will wait for that description, appreciate your help.
Learner.
Here it is. Hope it helps.
Hi Sasa, I am trying to setup virtual lab. I am having issues with setting up network. I followed same instruction to setup virtual network in Virtual Network Editior. However, even though i assign subnet IP (eg 1.1.1.0) and untick – Use local DHCP service to disribute IP address to VMs and ticked Host only, Subnet IP Address keeps reverting to 192.168 address. I also change network adapter ip on local host. can you please help.
Well, you may try running VMware with escalated privileges or turning the UAC (User Access Control) off. Not sure if this is causing your problem, but that’s the only think I can remember of.
hi like, you should I am able to access the exsi , but while accessing the vcenter getting below error. Moreover just to inform you I am able to ping the vcenter from my local computer(window 7)
vsphere client could not connect to vcenter an unknown connection error occurred.(the request failed because of a connection failure. (unable to connect with the remote computer))
Please give some time to vCenter server to start all of its services. This could take a while especially in a lab environment such as this one. Two of those services have a “automatic (delayed)” as a startup type. Try to start them up manually through a services console.
Hi Sasa,
Thanks for the top notch guide! It was very useful to me and I now have a lab very similar to yours except I’m using server 2012 to provide NFS storage and I used 5.5 instead of 5.1 and also used the vCenter vApp instead of the Windows vCenter.
I am just trying to make the networking a little better now and am having a few issues with this, wondering if you could help or point me in the rite direction.
So firstly you mentioned in your guide that 192.0.0.0 addresses should be used instead of the ones you used, could you please assist me in changing the ones used in your lab to “proper” IP addresses.
Also if I provide you with any information you may need to assist me, could you help me implement and use Distributed Switches?
Thanks again for the great guide 🙂
Thanks 🙂
I’m glad this works on 5.5. I will try to create some extra time to upgrade to 5.5.
For propper addresses you may use anything you desire as long as you don’t create yourself a black-hole. What I mean by this? If you use networks such as described in the blog, you won’t be able to reach them from your laptop. For example, if you use 1.1.1.0/24 for management network, then you won’t be able to reach any server or service out there on the Internet with IP addresses within that range, because they are local to yor laptop. It applies to any range you choose. If you are running this lab in your company, and your company uses 192.168.1.0/24 for something and you use 192.168.1.0/24 for your lab – you won’t be able to reach “real” equipment. So, you can use whatever you want as long as you don’t create a conflict. If you wish, you may use 192.168.1.0/24 for management, 192.168.2.0/24 for NFS, 192.168.3.0/24 for iSCI and so on.
As for vDS you asked, I may try this in the future, as well as going to 5.5, but I cannot give you any time frame becase I’m quite bussy and I’m doing these blogs in my free time (which is getting less and less by the day 😦 )
Ahhh perfect! Thank you for the information, just wanted to check first as I didn’t want to go messing anything up with the lab. I will change the networking around a little bit to make it more appropriate and in line with “real” network addresses.
That’s fine, I will keep an eye out for the blog post if and when you decide to create one. In the mean time I will probably stick with the standard vswitch unless I realise I need the benefits of a Distributed one 🙂
Hello sir,
Very great article, so useful! Thank you for your time to write it down.
I have a small question, right now trying to choose a laptop which later will be used to setup such labs, what do you think of the following if we assume that the RAM is 16GB and will have one 120GB SSD for the ESXi(maybe two ESXi hosts?), what processor can i go for? Core-i5 (2 cores) would be enough or Core-i7 (4 cores) is a must? The SSD and the RAM I think are the most important but the processor you know is the brain, so wondering how it will be with i5 the above lab for example?
Thank ou very much sir,
I like that SSD disk. Nice stuff 🙂
Although you could go with i5, I would recommend i7.
Hi SAsa,
you have mentioned “Now we power on the VM and install Windows server. I guess we all know how to do that, so I will not show these steps.”
what ip range should you used to domain server.
You should put it in the Management network (1.1.1.0/24) along side with the Virtual Center Server.
So we will give the DC an IP of management network
I.e. 1.1.1.4 for eg.
Then we have to change the default DNS and gateway of both esxi also.
So we will give the DC an IP of management network
I.e. 1.1.1.4 for eg.
Then we have to change the default DNS and gateway of both esxi also.
Hello,
Could u pls let me know ur laptop configration?im planning to buy one
It’s “HP ProBook 4740s” with 8GB of RAM, but I would suggest a laptop with 16GB of RAM and a SSD disk, if possible. This way you will be in a better position with vSphere 5.5, which requires more RAM.
The CPU is Intel Core i7.
Other components are not so relevant.
Thanks sasa ..with this we can practice vmotion and all? Os is windows 8.1 or?
Yes. I did vMotion, but other features should work as well. I did this lab on Windows8 and VMware Workstation9, but should work on Windows8.1 and Workstation 10. I will give it a try soon.
I have a existing Workstation installation with multiple VM’s that I use regularly. My question is will I be able to create a network for the lab and keep my existing network settings my current VM’s, and if I can do this, what network setting will I need?
You won’t break anything by creating additional network adapter types. If your current lab is using VMNet1, VMNet2, … you can create additional VMNets through the virtual network editor, configure and use them as described in the blog.
Thanks Sasa, I’ll try that.
Sasa,
sorry for bugging on laptop config.. im going to order this..hope this will work..
HP ENVY – 15t Touch
1. 4th generation Intel® Core™ i7-4510U Dual Core Processor + 2GB NVIDIA GeForce 840M Graphics
2. 16GB DDR3L System Memory (2 Dimm)
3. 256GB Flash Solid State Drive
4. 802.11b/g/n WLAN and Bluetooth® [1×1]
I thank you for this excellent article. Rarely I have found articles written very clearly as this one; also because, as I always said, sometimes a screenshot is more meaningful that 1000 words.
That said, I have some questions for you:
1) How many VM could I run within esxi 5.5?
With my PC (16gb ram, fast HD, and a quadcore) I had been able to run about 10 vm using just vmware workstation, having a complete Exchange test lab.
But, because I would study esxi 5.5, I would setup vm INSIDE esx (as you described) so that, to sum up, ONLY esxi would runs directly on top of vmware workstation.
In your opinion, how many vm would be able to run inside esx?
2) Distributed switch
I would study esxi Distributed switch (that I don’t know very well at the moment…).
Is possibile test them with a lab like yours?
3) VLAN
In enterprise environments, VLANs are always involved. Is possibile to add some more complexity to your lab using VLANs? If yes, do you have any suggestion? What could I do? Maybe using something like vyatta as described in this post? http://virtuallymikebrown.com/2013/01/08/fun-with-vyatta-and-home-routing/
Thanks again
Marco
Hello Marco! Sorry for late response, I was on vacation 🙂
1) It’s hard to tell. With 16GB of RAM not many, I’m afraid. ESXi 5.5 wants twice as much RAM comparing to 5.1. So, if you set up two ESXi hosts as a minimum for any sort of cluster, it will leave you with only 6GB of free RAM, if we say that Windows takes 2GB with all needed software. My recent experiments showed that one can run many more VMs in a lab such as this one, but running on some Linux flavor and VMware workstation.
2) You can use distributed switches just as ordinary switches. VMware, of course. I did not tried Cisco Nexus 1000V in this scenario.
3) Can’t help you with this at the moment 😦 But I will give it a try some time soon, because I’m about to prepare for my VCP-DCV lab 🙂
Thanks for participating.
I thank you very much for your kind reply. Now is very clear to me how to proceed. I will continue to follow this wonderful blog.
Thanks again!
bye
Marco
(Italy)
I got it all working.. Thanks!
Laptop: i5 3rd gen proc, 16GB ram, 1TB HD
ESXi 5.5 (Evaluation)
Server 2012 Standard (Evaluation)
can anyone give me the link to download VMware vSphere 5.1 ISO image.
Try here:
https://my.vmware.com/web/vmware/info/slug/datacenter_cloud_infrastructure/vmware_vsphere_hypervisor_esxi/5_1
You have to register first.
I have installed the vsphere client , but when i am trying to login to the esx host with the ip throws an error invalid username and password ..
i am able to ping the ip from my laptop cmd prompt and able to login into the esx host with the credentials which i am giving in the vsphere client to login.
Hey Sasa,
Everything went fine until I tried to install vCenter Server, I keep getting an error during installation saying it can’t connect to the DB and then rolls back to the start. This happens in both Simple Installation and Individual SSO installation. I’m trying to use the bundled DB. This is for 5.1.
I got it working, forgot to change Server 2008 R2 to a Static IP address.
This is a known bug of 5.1 version. Try downloading and installing newer version such as 5.1.0.a
(http://blogs.vmware.com/vsphere/2012/10/update-to-vsphere-vcenter-server-version-5-1-0a-released.html)
I’m running 5.1 Update 2 and about to download Update 3.
Hi Sasa
thanks to this post I have been able to setup an ESXi 6 lab like this. I just added vyos acting as router providing connectivity between networks. Anyway there is an item that I have not been able to understand even spending days reading documentation and blogs:
how to simulate a stretched lan?
I would simulate a disaster recovery using site recovery manager or virtual san+vmware replication but the documentation always speak about requiriments like “layere 2/layer3 with multicast support” or “stretched lan”.
To be honest with you I have some network knowledege but just managing firewall and switches (basic configuration, vlan etc…) so I don’t know these concept
In your opinion is possibile to buid something like this in a vmware workstation lab? If yes could you please give me some tips just to have something to start with?
Best
Marco
Sorry Marco, I did not have time to try ESXi 6 or streched lan. Perhaps some time in the future.
Hello Sasa,
Thanks for sharing.I had follow your guide but I can’t ping each other through ESXi 5.5 host. I’m using Workstation 9 .
Kindly advise what did I miss?
impressive and very proper documentation, thank you for the effort
Pingback: The 101 Series (Technology) - The Heights
Hello colleagues, how is all, and what you wish for to say about this post, in my view its actually remarkable in favor of me.